Professional gutter installation saves homeowners time and money by avoiding potential problems. Unchecked issues like rotting, leaks, and improper slope can increase repair costs down the line.
Start with a good plan to efficiently execute your gutter project. Gather the necessary materials before starting, including ladders, a ladder standoff, and a bubble level. Visit https://www.guttersandmoregutters.com/ to learn more.
A gutter might seem like just another simple feature of a house, but it plays a crucial role in keeping your home safe. Its main function is to catch rainwater and channel it away from the foundation, siding and landscaping of your property, preventing water damage that can lead to paint peeling, wood rot and structural issues. To do its job, the gutter system must be functional and free of clogs, leaks and cracks.
The gutter material you choose is a significant factor in this process, as different materials are better suited for certain climates and conditions. For example, steel and copper are well suited for snowy regions, while aluminum is an excellent middle-ground choice for homeowners who want durability and affordability. In addition, you should consider the lifespan of your gutters. Copper and stainless steel offer longevity, but they also come with a premium price tag.
Other important factors to consider when choosing the right gutter material are its ability to withstand heavy rainfall, its resistance to weathering and corrosion, and its flexibility in extreme temperatures. Once you’ve narrowed down your options, be sure to select a gutter shape that matches the overall style of your home. Gutter shapes include half-round (the least expensive option), K-style and seamless aluminum gutters, each of which has its own benefits and drawbacks.
Once you’ve selected a gutter material, you can start to prepare for the installation process by purchasing all of the necessary supplies. A ladder that’s sturdy enough to stand on is a must, as is a pair of safety glasses and work gloves. You’ll also need a tape measure and a calculator to help you make accurate measurements and calculations. Other tools you’ll need to hang gutters include a drill, tin snips or a hacksaw, and a crimper for the downspout elbows.
Before you get started, it’s a good idea to consult a professional for help. A seasoned gutter installer will have experience working with different roofs and will be able to adapt their approach to your unique situation for the best results.
Planning the Layout
The gutter installation process is complex, with a variety of factors that influence project timelines. Understanding these variables can help homeowners and contractors plan for a successful outcome. For example, specific roof structure features, the type of gutters selected and additional gutter accessories (gutter guards, downspouts), and the current condition of existing gutters (if applicable) are all critical considerations that impact the overall project duration.
Proper gutter placement is essential to ensuring that rainwater is diverted away from the foundation of the home. Gutters must be installed with a subtle slope to facilitate water flow, and this necessitates meticulous planning. Additionally, gutters must be anchored to the fascia with a secure connection, protecting the structure from deterioration.
To begin the process, carefully measure all roof edges where gutters will be installed, ensuring accuracy to the nearest inch. This ensures that the gutters will fit properly and avoid any potential leaks or clogs. Then, mark the location of each gutter run on the fascia with a chalk line. These marks will serve as guide points for the gutters during the installation process.
Next, fasten gutter hangers to the fascia with lag screws that are long enough to penetrate rafter tails 2 inches (as shown). Once the gutter hangers are in place, it is time to begin attaching the gutter sections. Start with the corners, which require precise fitting to prevent leaks, then move towards the center of each gutter run, ensuring that each section maintains its pre-established gradient of half an inch drop for every ten feet of gutter length.
Once the gutters are attached, seal all joints with a high-quality waterproof caulking to protect the system from leaks. It is also a good idea to install downspout extenders at the end of each gutter section to further optimize drainage and prevent water pooling.
Finally, conduct a thorough inspection of the completed gutter installation and make any necessary adjustments. This includes inspecting all joints and sealants for any signs of water damage and testing the system by running a hose through it to ensure it is functioning properly.
Cutting the Gutters
Gutter installation requires precise cutting to ensure proper fit and drainage. Gutters are important for directing water away from the foundation of your home, preventing erosion and structural damage. It’s also crucial to install gutter guards, which prevent leaves, pine needles, shingle grit, and twigs from entering the gutter system, keeping it clog-free and promoting efficient flow of water.
Prior to starting the actual cutting process, it’s a good idea to prepare a clutter-free work surface and set up some work support to hold the gutter section while you cut. It’s essential to have a stable position when working with sheet metal, as it’s very easy to injure yourself on corners and sharp edges.
Once the gutter is firmly secured in place, double-check the measurements and markings, then begin to cut it using your chosen tool. If using tin snips, cut slowly and steadily, making sure to keep the blade flat against the gutter for straight, controlled cuts. If you’re using a power saw, be sure to use appropriate safety gear and take frequent breaks to avoid overheating or breaking the gutter.
After the gutter is cut, it’s a good idea to use a file or sandpaper to smooth out any sharp or rough edges. This will improve safety, reduce risk of injury during installation, and create a more professional finish.
Once the gutters are properly cut, they can be fastened to the fascia board with brackets or hangers. Make sure the brackets are evenly spaced along the length of the gutter, and that they’re firmly attached to the fascia. It’s also a good idea to fasten the gutters at a slight slope towards the downspouts, typically 1/2 inch for every 10 feet of gutter. This helps to facilitate effective drainage and reduce standing water, preventing wood rot and other problems. It’s also a good idea for gutters to be capped with elbows, which help direct the water down and away from the house’s foundation. Lastly, downspouts should be securely connected to the gutters with screws or rivets designed for aluminum, and be sealed with silicone caulk.
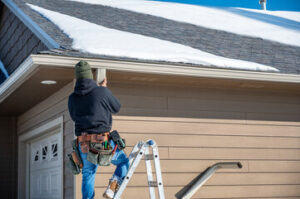
Installing the Gutters
Gutters are the channels that collect rainwater from a roof and divert it away from a house, reducing the risk of soil erosion and foundation damage. They may seem like simple exterior home components, but they play an essential role in preventing structural damage and basement flooding.
Professional roofing contractors take care of the majority of gutter installation and maintenance tasks. However, homeowners can save money and learn a lot by tackling some of the work themselves. The first step is to select a gutter system that will meet your needs. This includes a length and color, as well as the number of downspouts you need. It’s also a good idea to choose a gutter with gutter guards, which screen out leaves and other debris that could clog the channel.
Once you’ve selected the right gutters, it’s time to begin the installation process. Begin by inspecting the eaves and fascia for any signs of previous gutter damage. If you notice any rotted boards or sections, these will need to be replaced before the new gutters are installed.
Next, mark where you want the gutter to be placed on the fascia board. Use a chalk line to mark the angle and placement, then secure the brackets in place with lag screws. Be sure to space them evenly along the section of the fascia board, as this will ensure a proper flow of water. After the gutter is in place, use a level to make sure that it’s sloped downward, directing rainwater down toward the downspout.
To finish up, seal the end caps and any other openings with caulk. Make sure that the caulk is waterproof, as it will help keep moisture and organic materials out of the gutters. Then, install a downspout at each end of the gutter run. A downspout is a pipe that directs the rainwater to a designated area, such as a garden or sidewalk. When you’re done, enjoy your new gutters! They can last up to 20 years when properly maintained.